Controls shared by every module
Getting started · 4 of 6
All six modules use the same window: inputs on the left, results on the right, one button to recompute. Learn it once.
Window layout
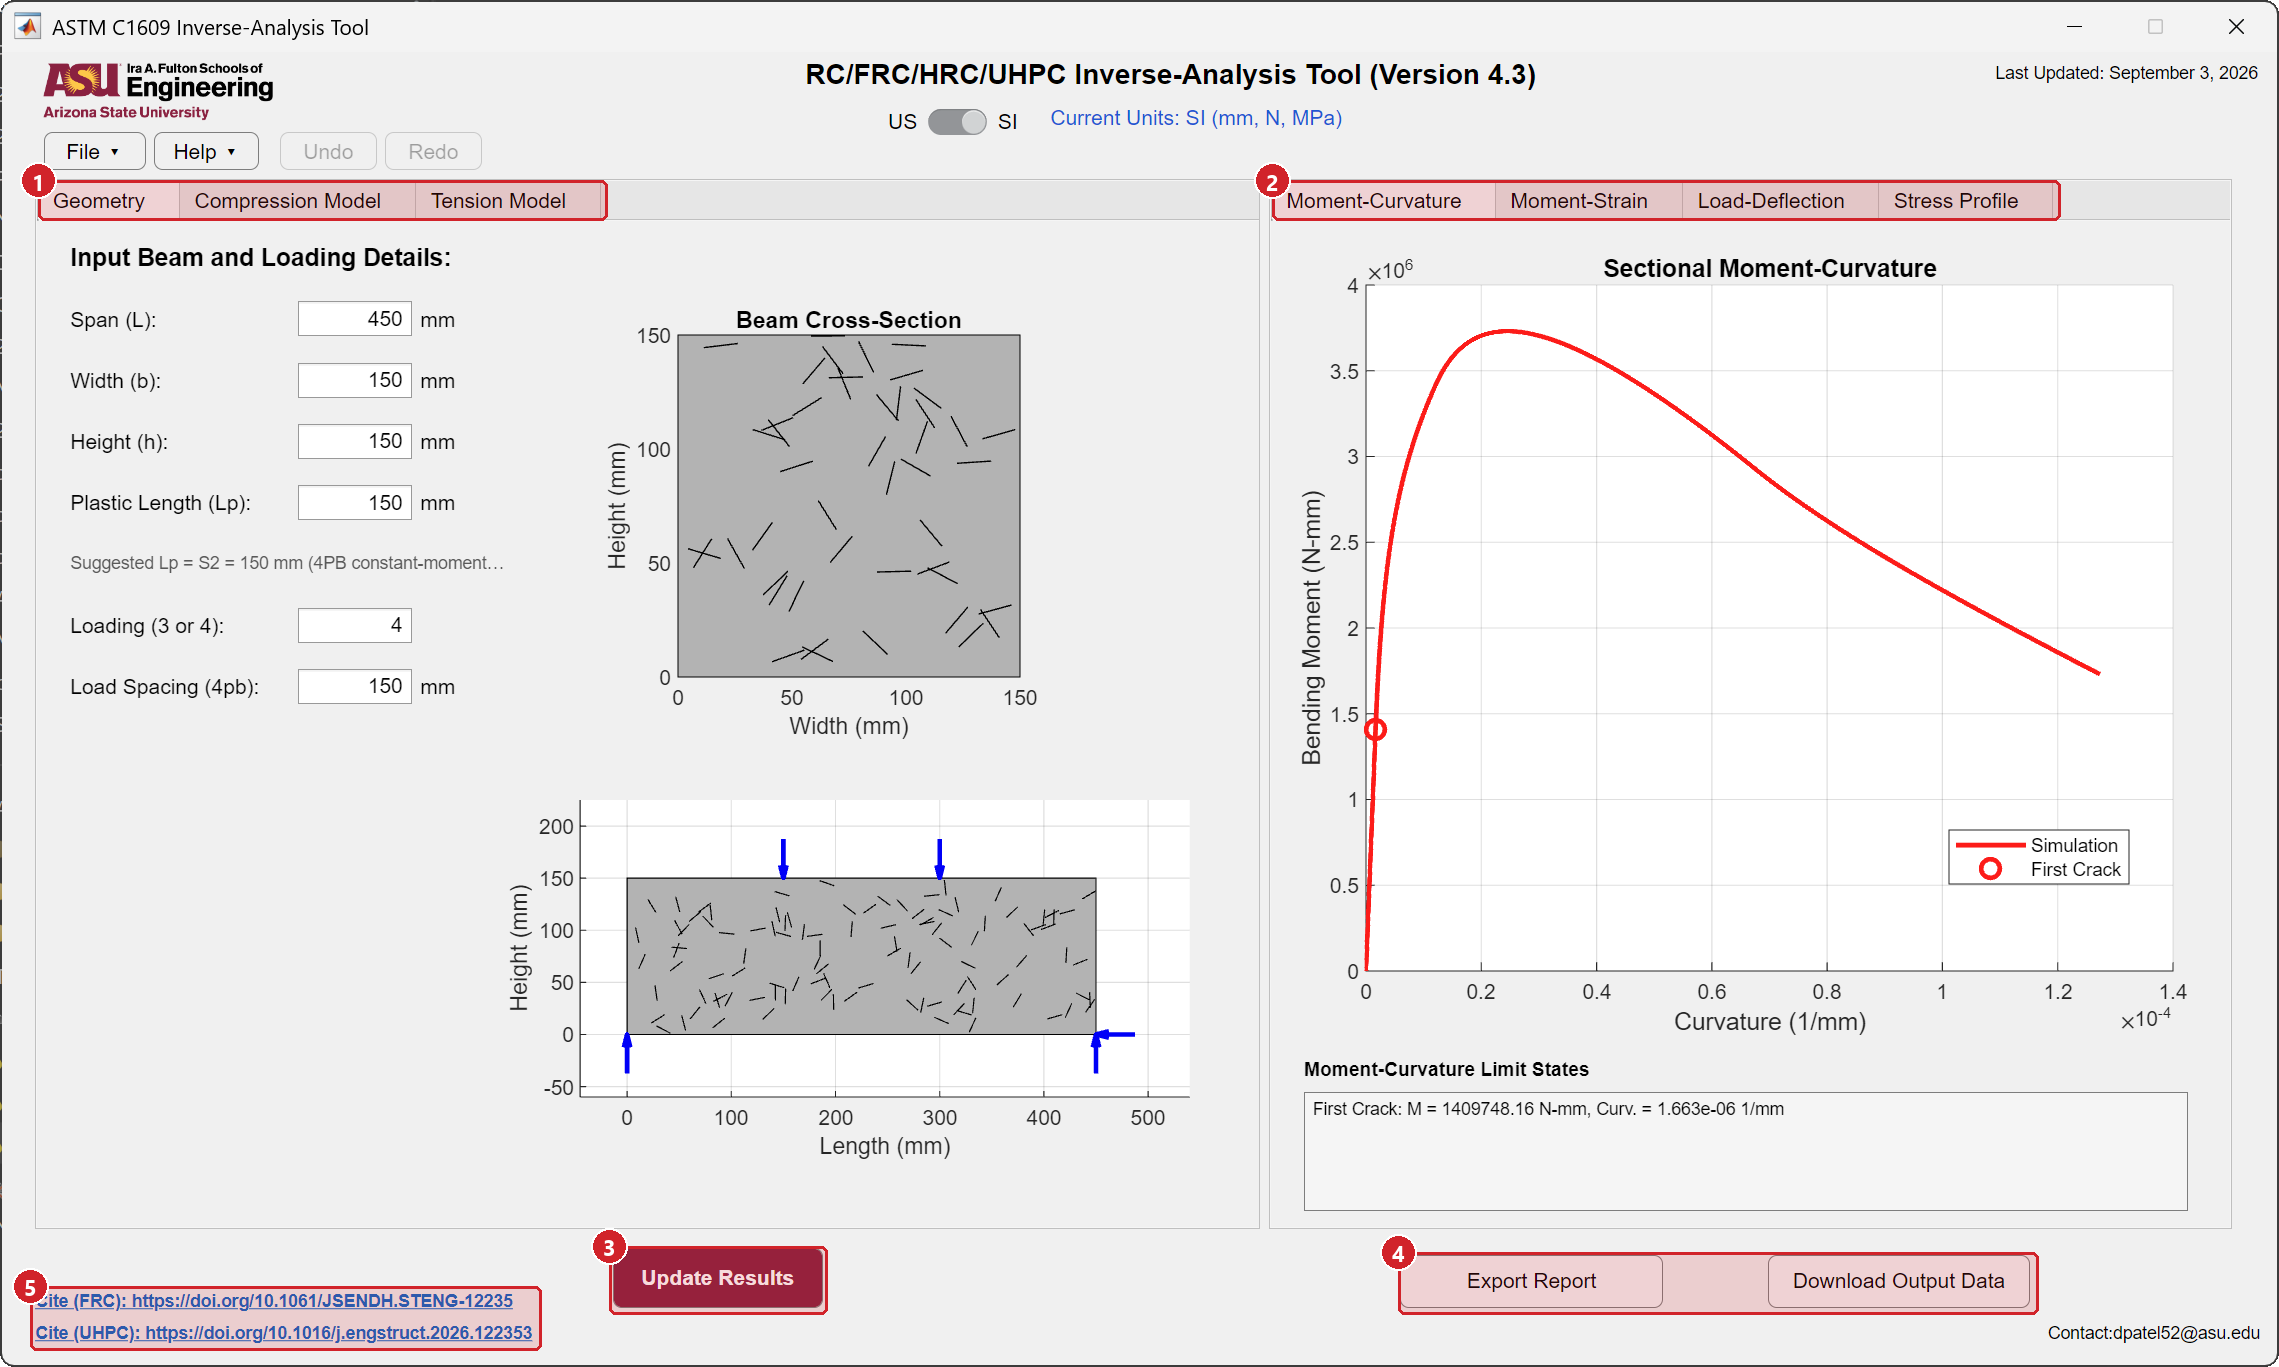
- Input tabs. Geometry first, then the material laws. Each tab shows a drawing or a plot of what you typed, so a wrong value is visible immediately.
- Result tabs. Moment-curvature, load-deflection and the other outputs. When there are more tabs than fit, arrows appear at the ends of the strip.
- Update Results (or Run Analysis in the cross-sectional module) recomputes every result tab from the current inputs. The keyboard shortcut is F5.
- Export Report writes a single-file HTML report. Download Output Data writes an Excel workbook with every curve and the input parameters. Both are also in the File menu.
- Citation links open the papers that define the model. The support email is in the opposite corner.
Header controls

- File and Help menus. Drop-down menus drawn inside the window. Their items are listed below.
- Undo and Redo. Every typed value, drop-down choice, switch, table edit, drag, import, preset and auto-fit is one step. Ctrl+Z undoes, Ctrl+Y or Ctrl+Shift+Z redoes.
- US / SI switch. Every module starts in US customary units (inch, lbf, psi). Flip the switch to SI (mm, N, MPa). All values on screen are converted, including imported test data. Opening a project or example switches to the units the file was saved in.
- Current units. Confirms the active unit system. Test data files must be in these units when they are imported.
- Release stamp. Version and release date. Quote them in a support request.
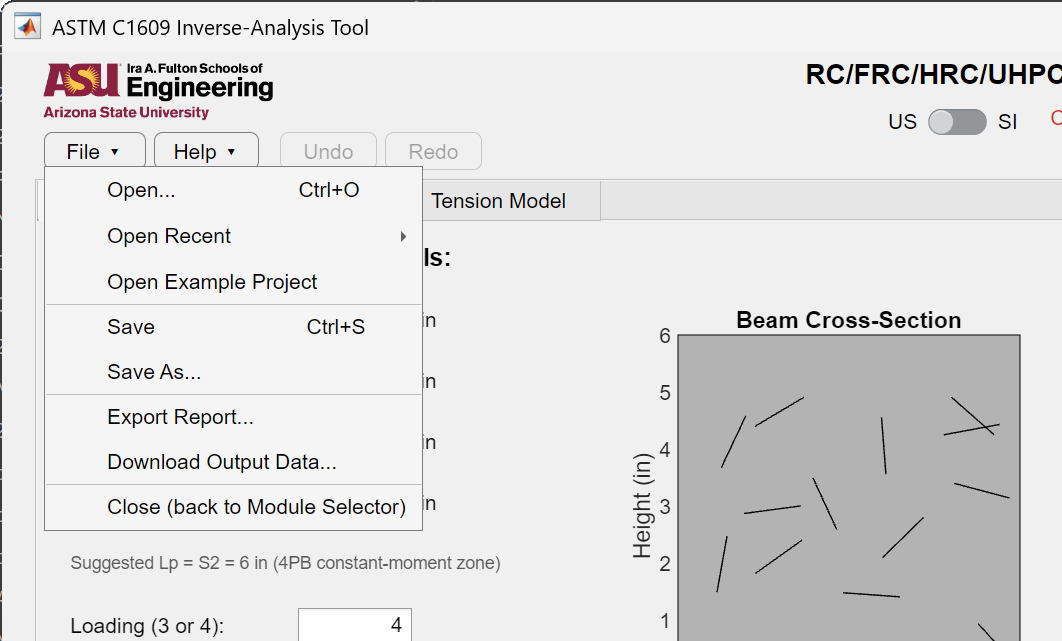
File menu
| Item | What it does |
|---|---|
| Open… Ctrl+O | Opens a saved project file (.mat). |
| Open Recent | The last projects opened on this computer, with a Clear list entry. |
| Open Example Project | Loads the reference project selected for the module: geometry, material law and test data together. Saving asks for a new name, so the example is never overwritten. The reference project is chosen separately from this manual and may be a different specimen from the one in the screenshots; the worked examples are downloadable as project files. |
| Save Ctrl+S / Save As… | Saves inputs, fitted laws, imported curves and the unit system to a .mat project file. |
| Import Material… | Design modules only. Reads the material law from an output workbook written by an inverse-analysis module. See Projects, reports and output data. |
| Export Report… | Writes the HTML report. |
| Download Output Data… | Writes the output workbook. |
| Close | Returns to the module selector. Unsaved changes are confirmed first. |
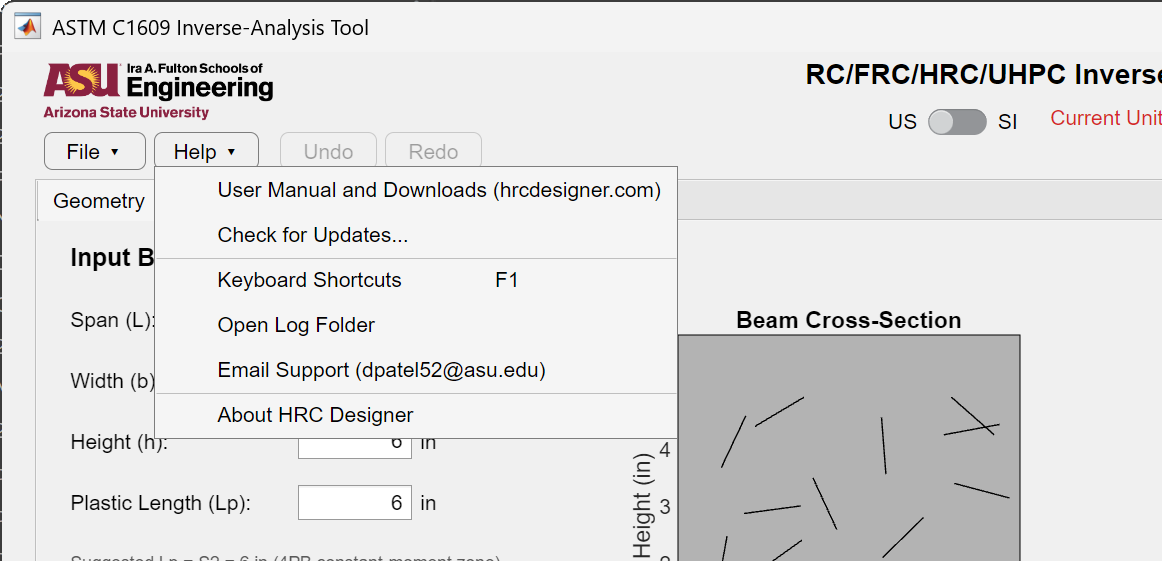
Help menu
| Item | What it does |
|---|---|
| User Manual and Downloads | Opens hrcdesigner.com in the browser. |
| Check for Updates… | Compares the installed version with the one published online. |
| Keyboard Shortcuts F1 | Shows the shortcut list. |
| Open Log Folder | Opens the folder holding hrc_designer.log, the file to attach to a problem report. |
| Email Support | Starts an email to dpatel52@asu.edu with the module, version and operating system already filled in. |
| About HRC Designer | Version, release date, citations and the disclaimer. |
Live dragging of a material law
Every tension and compression plot on the input tabs is interactive. Press and hold a vertex of the curve, drag it, and release. The stress and strain fields, the plots and every result tab update while you drag. The active experimental curve stays on screen so you can tune the law by eye before or after an Auto-Fit. Each drag is one undo step.
Display precision
Input boxes show three significant digits. The stored value is not rounded. Click into a box to see or edit the full value.
Errors
An input that cannot be used produces one plain-language dialog that names the box, gives the offending numbers and says what to change. Nothing is recomputed until the value is fixed. Every dialog is also written to the log file, see Troubleshooting and support.